

If you want improved accuracy from your weapon, you need to know how to properly mount a red dot sight. While in many cases, reflex sight mounts are designed to be user-friendly and intuitive, that doesn’t mean every sight is perfect for every gun. It’s important to understand the design of your sight, the mounting options your gun offers, and how to make the two work together for reliable accuracy and the protection of both your weapon and the precision optic you attach to it. Here’s how to get your optic mounted and ready for action.

Your red dot mount is the point at which your optic secures to the pistol. It’s important to understand that this connection can turn into a weak link for precision shooting if the sight isn’t secured and maintained properly. Improper mounting will throw shots wide, risk damaging the investment you’ve made in your weapon, and could lead to injury. There are several mounting types commonly found on modern performance optics.
As the popularity of customizing weapons for aftermarket optics increased, gun manufacturers took note and began pre-drilling some weapons to accept a standard optic mounting pattern. This meant gun owners no longer needed to hunt down a gunsmith to custom mill the weapon for optics…as long as the gun’s pattern matched the optics the customer wanted to use.
Adapter plates and risers help mount a red dot sight on weapons with an incompatible factory mounting pattern or that have a cheek weld that is high enough that the reflex sight mount needs to be lifted to eye level. While necessary in some cases, these require care as the additional parts offer additional opportunities for problems if care isn’t taken.
Top rails are popular on rifles, carbines, and some longer-barrelled pistols. Rails offer you a range of placement options to make your red dot mount work best for you.
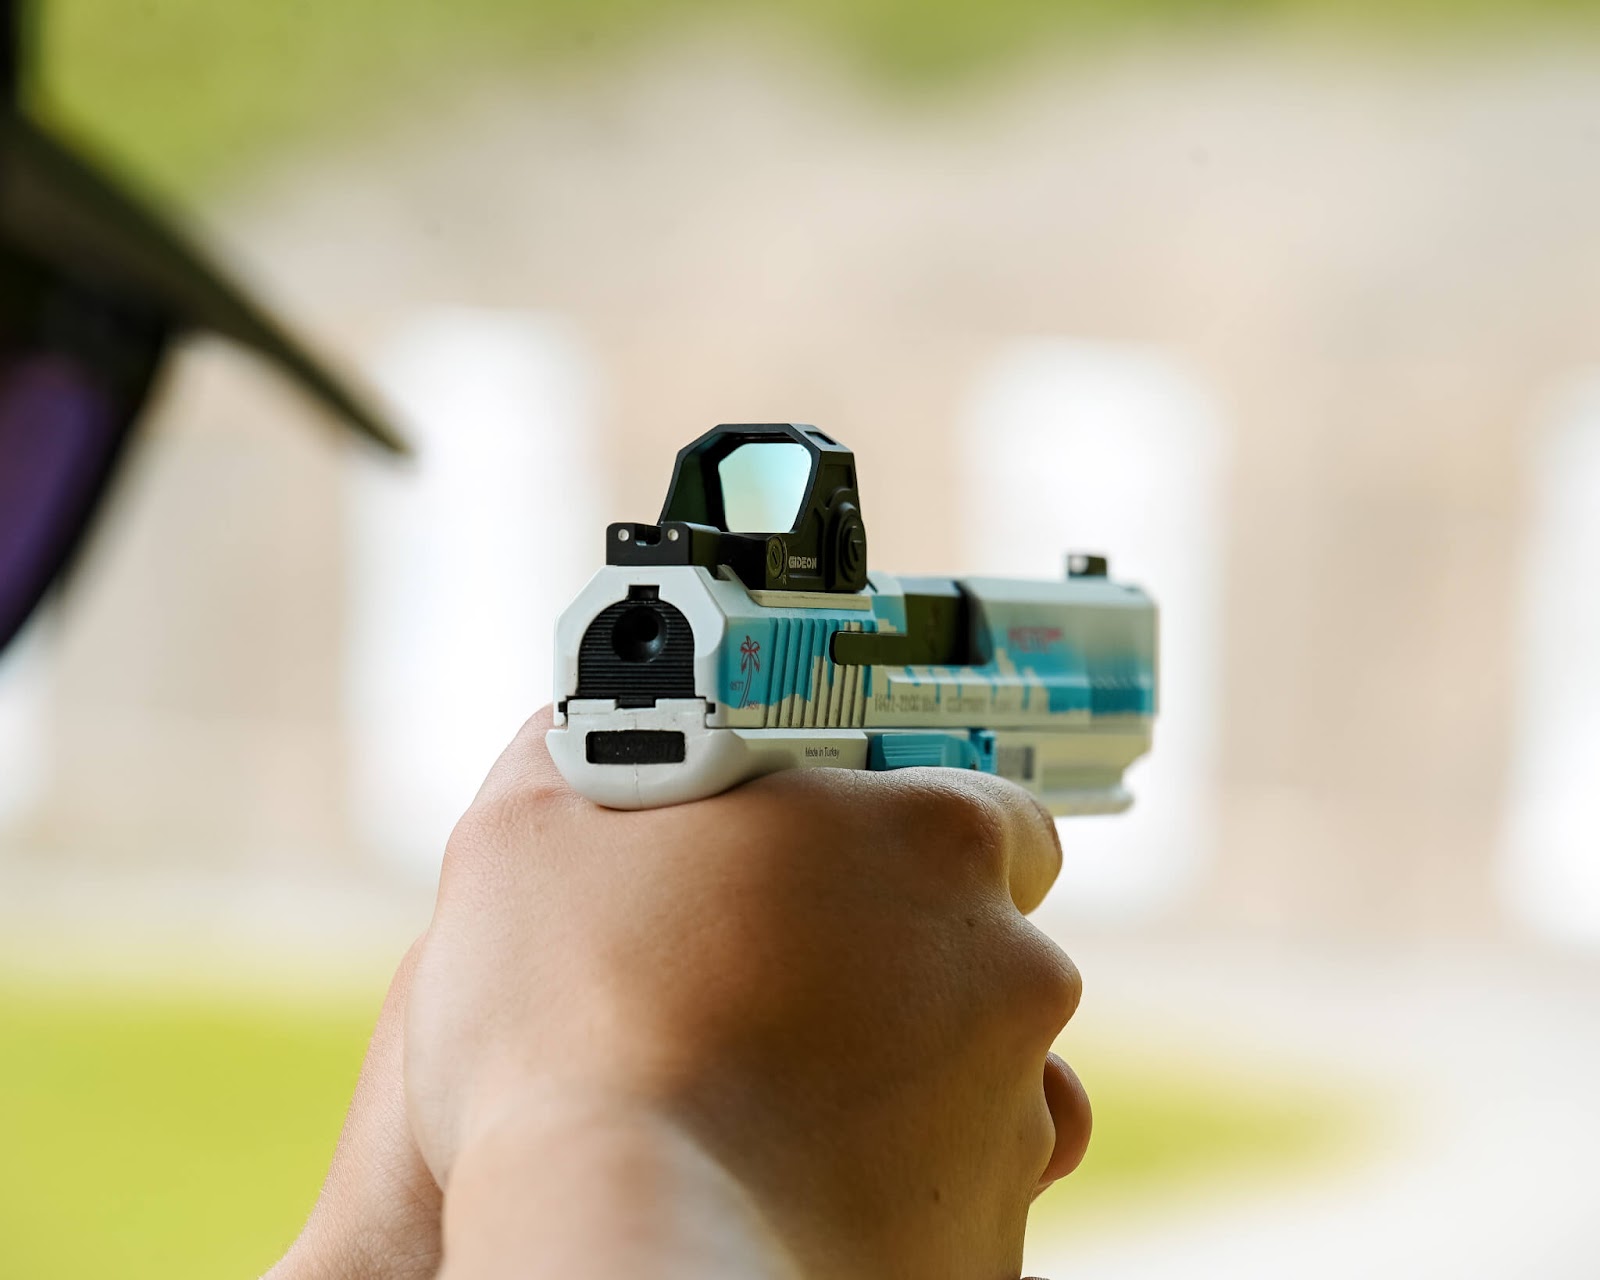
Whichever reflex sight mount option your gun will accept, there are some best practices to keep in mind when installing your optic. These will help ensure you get the right fit, secure attachment, and that you don’t have hidden issues that are literally eating away at your gun, sight, or accessories without you being aware of them.
Before you mount your red dot sight, you want to clean and degrease any metal-to-metal contact points. This includes the mounting surface on your weapon, the corresponding surface on the optic, and, if you’re using an adapter plate or riser, their surfaces as well. If you removed a mount cover plate from the weapon to expose its mount surface, clean and degrease the cover plate before storing it. You want to eliminate any moisture or corrosive elements before hiding them away from sight with a red dot mount.
Pre-position your reflex sight mount to make sure its footprint works with your weapon, adapter plate, or riser. Red dot sights have unlimited eye relief, meaning that your eye can be as near or far as you’d like from the sight. For rail red dot mounting, moving the sight as far forward as practical opens up several auxiliary optics options, like adding iron sights as a backup aiming system or a magnifier that focuses through the red dot itself.
As you fire your gun, the recoil pushes it up and back against your hand or shoulder. When mounting your reflex sight, you can help mitigate the effect on your optic’s stability by applying gentle forward pressure as you tighten the mounting screws. This helps secure the optic in the position the recoil forces are trying to push it toward, helping you maintain a tight seal and excellent stability.
Whether you use Loctite or another brand of fastener adhesive, make sure you use the blue semi-permanent variety and not the red permanent type. While you want an adhesive to help prevent the vibrations of using the weapon from loosening your red dot sight mount screws, you also don’t want to have to drill the mount off at a later date.
“As tight as I can get it” is a sure path to stripped screws and pricey repair bills. Refer to your owner’s manual or gun manufacturer’s website for their recommended torque on reflex sight mount screws and bolts, then set your torque wrench appropriately.
Like all adhesives, the one on your sight mount needs time to cure before you put it to use. Usually, twelve hours is enough time for it to set, locking its screws in place for a secure red dot sight mount.
Now it’s time to zero in your optic. Begin by bore sighting it to save ammunition, then adjust for windage and elevation at a range. Remember to make your adjustments slowly to bring your groups in tighter.
These optics terms come into play when your red dot sight mount is used alongside the iron sights or other optics, depending on the circumstances you encounter. They can affect your reflex sight mount position because each is used in relation to the other aiming system in a different manner.
Absolute co-witness occurs when your weapon’s iron sights line up with the center of your red dot. This lets you enjoy both the benefits of a red dot sight and a consistent aiming point should ambient light or your battery levels keep the red dot from being visible. This takes both the right height of traditional sights paired with an appropriate riser.
Similar to absolute co-witnessing, this style of aiming moves the iron sights down to the lower third of your red dot sight’s window. They’re still available for use when needed, but the iron sight is out of the way during normal operation.
Some long guns will allow a red dot mount to be attached to a rail offset 45 degrees from the normal top-of-the-rifle positioning. This allows the shooter to use a mid-to-long-range optic, such as a scope, on the top rail while attaching a reflex sight for short-range rapid target acquisition and precision where it’s out of your primary optic’s way.
We’re proud to bring you precision optics that match up to the big names in everything but a big price. Subscribe to our email list to get the top deals and new product information sent to your inbox. Order your red dot sights and mounts from Gideon Optics today.


